
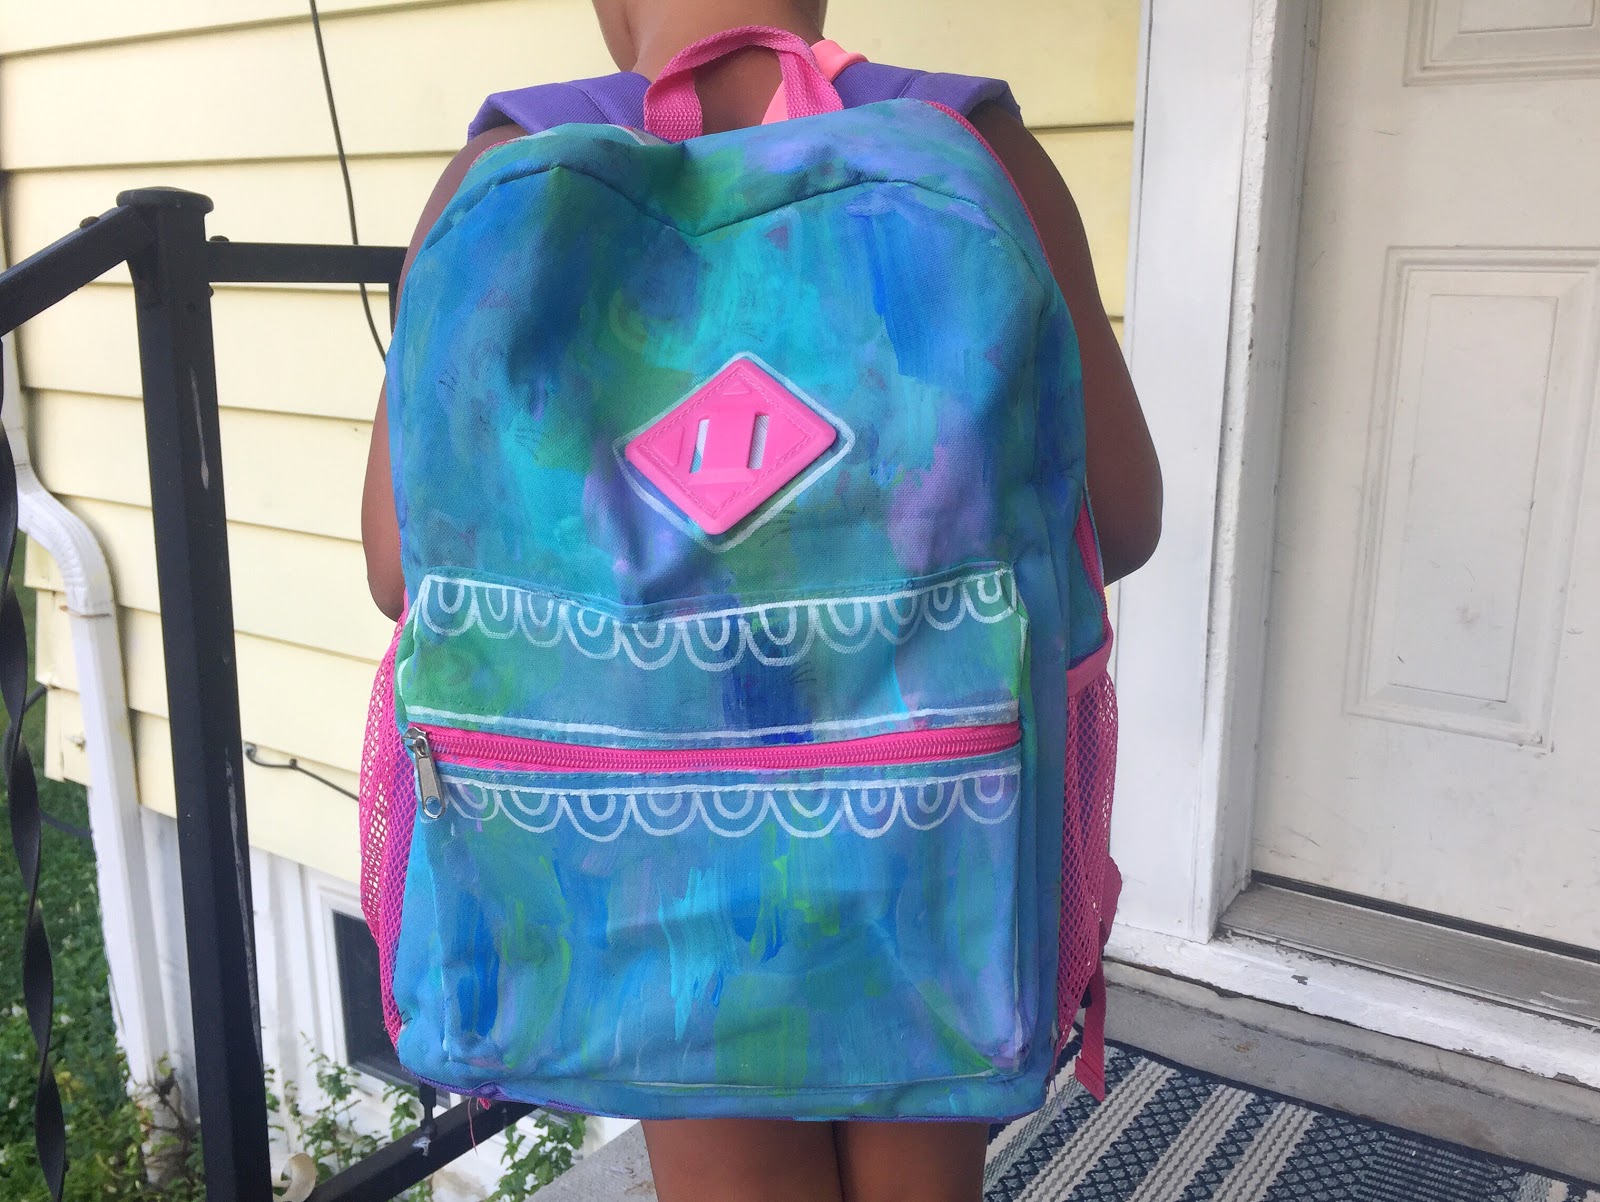
Cora goes back to school this week and I wanted to kick off the week sharing this easy and inexpensive school-related DIY. Two years ago, we painted Cora's lunchbox, so we thought we'd give her backpack a little makeover before she starts Kindergarten. This only takes about 30 minutes and she'll be reminded of the fun we had when she sees her backpack every day.

1 - Tape off the edges, zipper, piping, and any details that you want to keep.

2 - Pick a limited color palette that will not turn muddy (we usually like to stay in the cool colors). We use inexpensive acrylic paints found at any craft store.

3 - Go to town with the paint! My goal is usually to make sure everything is covered with paint while Cora focuses on adding her touch to a couple of areas. Try to keep the layers of paint thin, so it doesn't get crackly over time.


4 - Take off the tape and let dry. We usually have leftover paint for projects like this, so Cora will paint on some scrap papers or add a little bit to some extra canvases if she still feels like painting.


5 - (Optional) add some finishing touches with paint pen. I showed Cora a couple design ideas and she picked what she liked.


No comments:
Post a Comment
Thanks for taking the time to comment. Have a golden day!