pinterest.com

Showing posts with label Creating with Ida. Show all posts

12.04.2018

Creating With Kids : Painting Ornaments

During Thanksgiving break, Cora requested that we finally paint our christmas ornaments. I bought a bunch of plastic ornaments from Michaels right after Halloween and she has been asking to paint them every single day for the last couple of weeks. We laid out some cardboard, turned on the Christmas music and got to work.

For a while, Cora was trying to be pretty neat and use a paint brush... then she started finger painting. It was interesting to watch her process. Some times she would paint her hand then put them on the ornaments and other times she would put little dots all over the ornament before mixing it all up.

While Cora was painting a million ornaments, I had Ida paint these wooden IDA letters that I purchased before she was even born. I also have ones for Cora that she painted when she was around 2.5 years old and I can't wait to get these both hung up. Ida is always pretty timid at first before she goes wild with the paint.


Once Ida was finished painting her letters, she took a page from Cora's book and tried a little bit of ornament finger painting herself. She only wanted to paint for a couple minutes before she was over it.


Once the ornaments dried, we drew some designs on top of the paint with paint pen. Cora's designs were really versatile with faces, cats, and even an ornament full of letters/numbers she knows. She was really cute drawing and saying things like "so-and-so will really like this one" and "I can't wait to give this to so-and-so"etc. Once the drawing was done, I did a light clear coat and hung them up to dry.
Since most of these are for Christmas gifts, I'm not going to share a complete after yet (all the drawings are facing the other way), but I definitely call this a successful DIY. It was easy for both girlies and was perfect to split up into more than one DIY session. 

10.30.2018

Tips For Creating With Kids

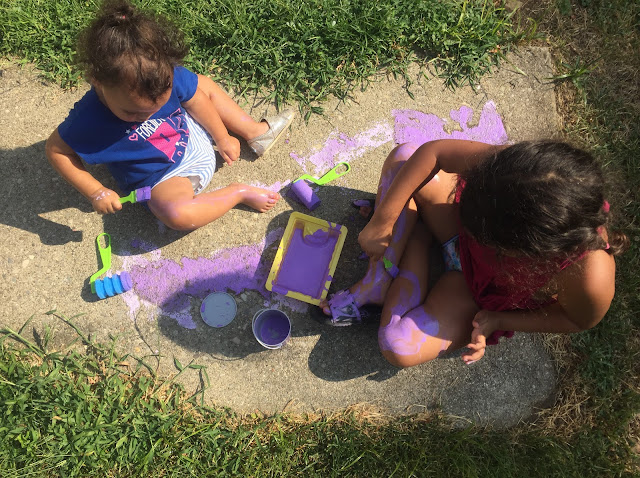
Because I love to create, I'm intentional about making time for my kids to create. Spending time DIYing is one of our favorite things to do together. I always receive compliments about how much people love how I create with my kids, so I threw together some of my tips for a successful creating session with my girls.
PREP - Prep is key to enjoying time creating with kids. Lay out a drop cloth, have paper towels and wipes handy, strap younger kids in high chairs (if using tray, cover with garbage bag), and messy clothes (or no clothes) for everyone. Snacks and music are always a good idea to prolong the DIYing.


CHECK YOUR EXPECTATIONS - be okay with a mess, focus on enjoying the process, and don't expect a masterpiece from every creating session. Many times I have to remind myself that our materials aren't precious... It's okay to use up a lot of paint or go through a million sheets of paper. Expect some projects to take multiple sessions. Our DIY christmas ornaments took a couple days to make (clay one day, paint another) so starting early and planning for multiple sessions made the project more enjoyable.

LIMIT COLOR PALETTE - Choosing an analogous color scheme (colors next to each other on the color wheel) keeps your child's art from becoming muddy. I generally like to choose a couple different blues and greens so they have a lot of shades to pick from. As my kids get older, they get to pick more colors.


CONSIDER COLLABORATING - Some of my favorite creating sessions were when we work on something together. These usually result in a fun piece of art to enjoy and a longer creating session than when we're working on our own solo projects. When working on a piece with your kid, follow their lead so they can stretch their creativity, mirror their strokes, and keep up the encouragement.

MIX IT UP - Work with a variety of medium. Sometimes we'll start out working in watercolor and end up drawing with markers. I introduce different medium as they start to get tired with something (usually when they get super messy) and they will continue on creating. Introduce them to different things like clay, water color, acrylic paint, pastels, etc. They may really love something random and we'd never know if we didn't try out a bunch of different things. I also love to let the girls work on larger projects like furniture painting or our cottage makeover.


DOCUMENT - Snap a couple of photos at the beginning when they start... or throughout the process. I love cutesy end of DIY pictures, but generally when we're finished, the girls are finished and won't even stop for a quick pic. The in process pictures are some of my favorite pictures and sometimes an in process art piece ends up so completely different than the finished piece.

CELEBRATE THEIR WORK - Compliment their technique and imagination, discuss what they like about it, and display their work! Building confidence in their artistic ability is a huge boost for the enjoyment of future creating sessions. I love hanging the girls stuff around the house in frames, on our fridge, on our calendar wall, or gifting it to family members.


ENJOY THE PROCESS! - I know I already mentioned this, but it is the most important tip so I'll say it again. Enjoy the process!!! If you want to instill the love of art and creativity into your kids, you want this process to be enjoyable. A lot of our artwork gets scrapped, but we enjoyed our time creating so we call it a success. 

5.09.2018

Mother's Day Flower Pots

I have always loved the idea of painted flower pots for a Mother's Day gift, but I get sad thinking about the girls doing a project without me... So last year Ben, Cora, and I painted together and now our new Mother's Day tradition is to have a family flower pot painting session. I buy $1 terra cotta pots (like these from Home Depot or Lowes), lay out the drop cloth, put on some music, and we all get to work. It is fun to see what everyone decides to paint and I can't wait to have a huge collection of painted pots.
This year was extra exciting for me because it was Ida's first time painting. Cora started painting around 18 months, so I knew Ida should start painting soon. Ida ended up loving the project and doing such a good job. She only tried to eat the paint once and was surprisingly clean overall. She observed the rest of us as we would pick up our pot or move it around and followed along so well... Ida is basically a prodigy.


Ben started out with a simple plain white and brownish pot, then added this creepy character. The face creeps me out a bit, but it's growing on me and now I kind of like the weirdness of it.  
Cora picked a rainbow pallete and got straight to work. She painted stripes of rainbow around the sides and then took some inspiration from Ben and added a person. Cora told me it was "a zombie with it's leg ripped off"... thank you Cora, so lovely!


We repotted some mini roses that I already have and we'll find something new for Ben's pot. I love looking at these when I stand at my kitchen sink and I love the little memories from our family painting session.

 A couple days later, the girls worked on their Mother's Day pot for my mom.


What is your favorite Mother's day DIY?

Related Posts Plugin for WordPress, Blogger...